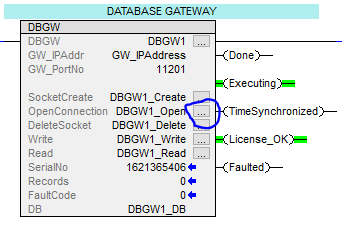
1. Add DBGW Add-On instruction into PLC-program #
1.1 Select the program you want to use.
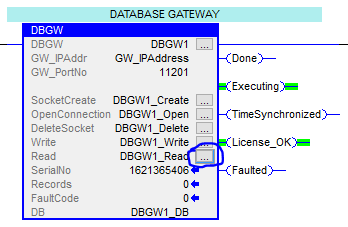
1.2 Insert new Rung, click on Add-On and select DBGW
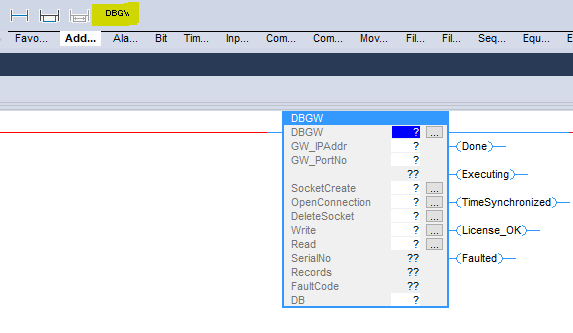
1.3 Enter and create your preferred Tagnames
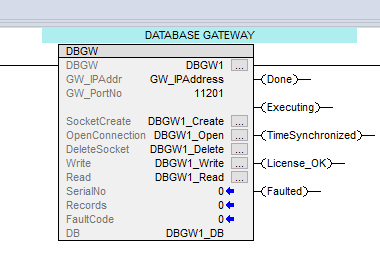
1.3.1 DBGW: myTagName (Default DBGW1)
1.3.2 GW_IPAddr: myIPAddress (Default GW_IPAddress)
After creation, right click on myIPAddress (GW_IPAddress) and select Monitor.
Enter IP-address or Computer Name for where DBGW Service is running.
Note: If Computer Name is used, IP-address for Primary DNS Server has to be entered in PLC’s ethernet port configuration.

1.3.3 GW_PortNo: Enter listening portnumber for Windows DBGW Service. See point 2.1 (Default 11201)
Note: Instead of a fixed value, create a DINT-tag. You can hereby access multiple Windows DBGW Services with different listening portnumbers.
1.3.4 SocketCreate: myTagName (Default DBGW1_Create)
Note: Tags for SocketCreate, OpenConnection, DeleteSocket, Write & Read must be Global tags, not Local tags
1.3.5 OpenConnection: myTagName (Default DBGW1_open)
1.3.6 DeleteSocket: myTagName (Default DBGW1_Delete)
1.3.7 Write: myTagName (Default DBGW1_Write)
1.3.8 Read: myTagName (Default DBGW1_Read)
1.3.9 DB: myTagName_DB (Default DBGW1_DB)
1.4 Message instruction (MSG) setup
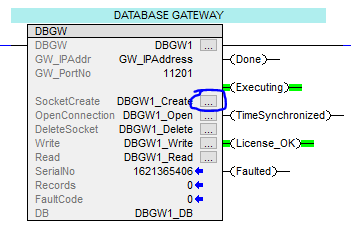
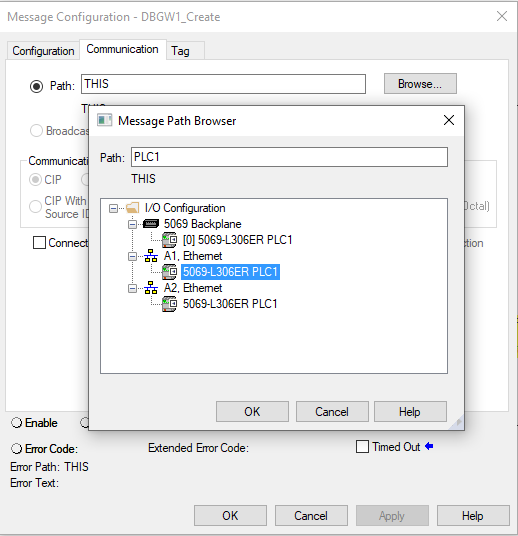
1.4.1 Click on button to the right of DBGW1_Create, and select/enter the values shown below:
Source Element = DBGW1_DB.SocketCreate
Destination Element = DBGW1_DB.InstanceNo

Select tab “Communication” and browse to Ethernet module or built-in Ethernet port, and click “OK” twice
Using separat ethernet module:

Using built-in ethernet port
1.4.2 Click on button to the right of DBGW1_open, and select/enter the values shown below:
Source Element = DBGW1_DB.SocketOpen
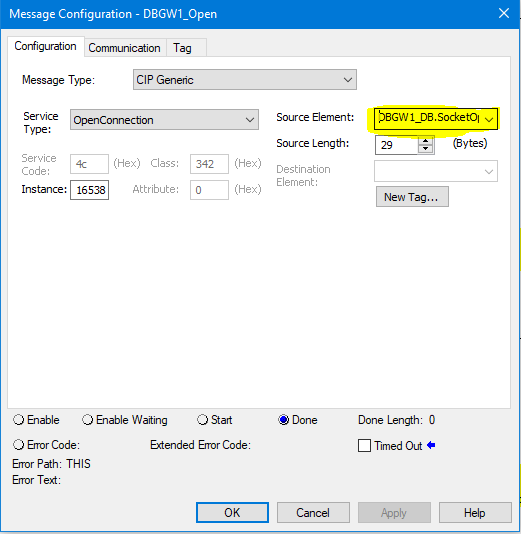
Select tab “Communication” and browse to Ethernet module or built-in Ethernet port, same procedure as under point 4.
1.4.3 Click on button to the right of DBGW1_Delete, and select/enter the values shown below:

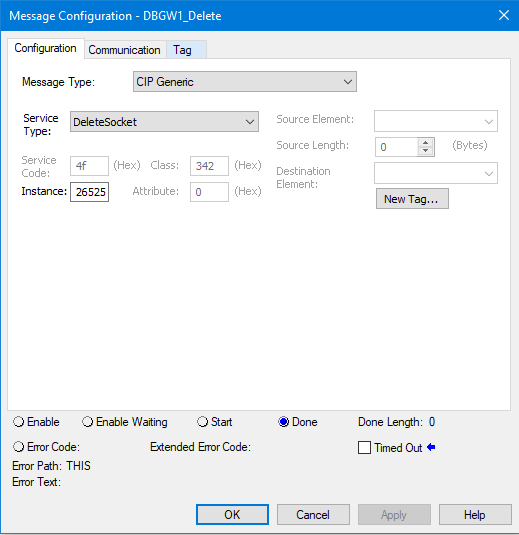
Select tab “Communication” and browse to Ethernet module or built-in Ethernet port, same procedure as under point 4.
1.4.4 Click on button to the right of DBGW1_Write, and select/enter the values shown below:
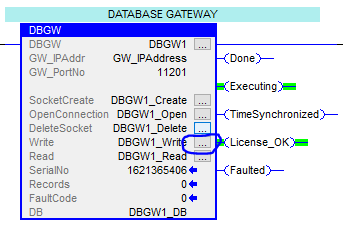
Source Element = DBGW1_DB.Write
Destination Element = DBGW1_DB.DataSend
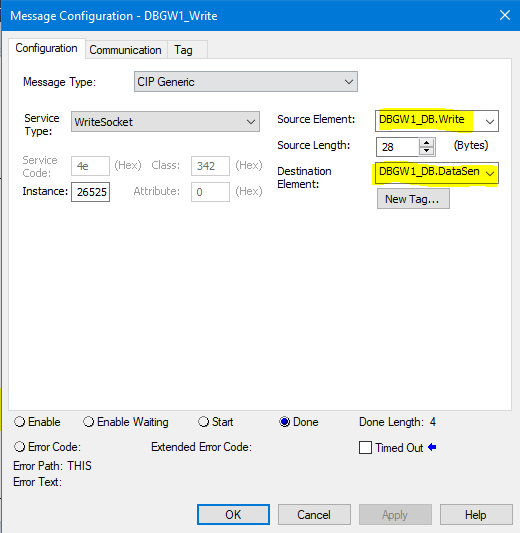
Select tab “Communication” and browse to Ethernet module or built-in Ethernet port, same procedure as under point 4.
1.4.5 Click on button to the right of DBGW1_Read, and select/enter the values shown below:
Source Element = DBGW1_DB.Read_Req
Destination Element = DBGW1_DB.Read
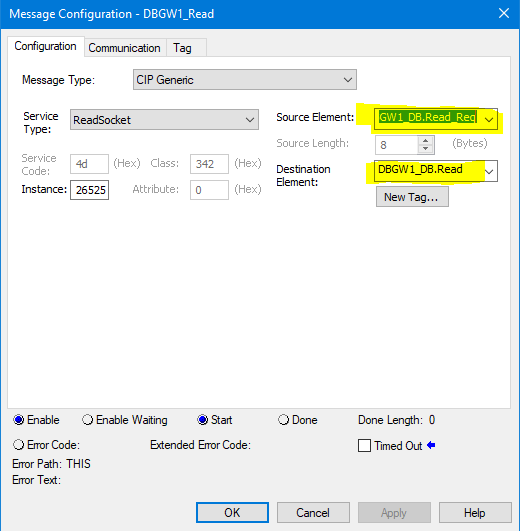
Select tab “Communication” and browse to Ethernet module or built-in Ethernet port, same procedure as above.